Brush Away Hair and Debris After Every Use
Loose hair and skin flakes pack into the teeth and between the blade plates every time you clip. Left there, they hold moisture, dull the edge and make the blade drag. As soon as you finish, brush the blade thoroughly with the little brush that came with your clippers.
Work the brush along and across the teeth to dislodge trapped hair, and pay attention to the gap between the two cutting plates where debris hides. A quick puff of air or a tap on your palm clears the last of it.
Doing this after every single session, not just occasionally, is what keeps a blade cutting like new.
Brush the blade the moment you finish clipping, while the hair is loose. Trapped debris is what dulls and rusts a blade.
Clean the Blade With a Proper Blade Wash
Brushing removes the bulk, but oils from the skin and fine grime build up on the metal and need a wash. With the blade attached, run the clipper and dip just the teeth into a shallow dish of blade wash for a few seconds so the moving blade draws the fluid through itself.
Let the loosened gunk and old oil run out, then wipe the blade dry with a clean cloth. Do not submerge the whole clipper, and keep fluid away from the motor housing. This deeper clean is worth doing every few sessions, or whenever the blade looks or feels gummy.
A blade that pulls despite being sharp is often just clogged, one of the causes covered in the pulling troubleshooter.
Dip only the blade teeth, never the whole clipper. Blade wash in the motor housing can wreck the unit.
Oil the Blade in the Right Places
Oil is what lets the two plates shear smoothly instead of grinding. With the clipper running, put a single drop of clipper oil at each front corner of the blade teeth, a drop along the teeth, and a drop on each side rail where the plates meet.
Run the clipper for a few seconds to spread the oil, then wipe off any excess with a cloth so it does not fling onto the coat. Use only clipper or a light machine oil, never cooking oil or thick lubricants, which gum up and attract dirt.
Oil during a groom as well, roughly every 15 minutes, not only at the end. A well-oiled blade cuts cleanly and runs cool, which prevents the burns discussed in safe clipping basics.
Use clipper oil or light machine oil. Cooking or vegetable oils turn sticky, clog the teeth and ruin the blade.
Dry, Protect and Store the Blades Properly
Blades are steel and steel rusts. After cleaning and oiling, wipe the blade so a thin protective film of oil remains, then store the clipper somewhere dry rather than a damp cupboard or bathroom.
If you have spare blades, keep them in a dry box or wrapped in an oiled cloth, teeth protected so they cannot chip against each other. A chipped tooth ruins a clip, snagging every pass.
Send blades for professional sharpening once they no longer take an edge from cleaning alone. Well-stored, regularly oiled blades last for years and pay you back with an effortless, painless clip every time.
Leave a light film of oil on stored blades and keep them somewhere dry. A rusted blade cannot be brought back.
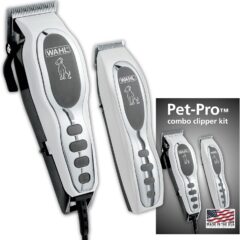
If you buy through our links we may earn a commission at no extra cost to you.
Frequently Asked
Brush and oil the blade after every use, and oil again roughly every 15 minutes during a long groom. Give the blade a deeper wash with blade cleaner every few sessions or whenever it feels gummy.
Use a purpose-made clipper oil or a light machine oil. Avoid cooking, vegetable or thick oils, which turn sticky, clog the teeth and attract dirt, doing more harm than good.
With the clipper running, place a drop at each front corner of the teeth, a line along the teeth, and a drop on each side rail where the plates meet. Run it briefly to spread, then wipe off the excess.
No. Dip only the blade teeth in blade wash and keep fluid away from the motor housing. Submerging the clipper can ruin the motor, so clean the blade alone and store the unit somewhere dry.