Manage Blade Temperature to Use Dog Clippers Safely
The single most overlooked risk when learning how to use dog clippers safely is heat. Blades warm up quickly through friction, and a metal blade that feels only mildly warm to you can be uncomfortably hot against thin dog skin. Clipper burn most often appears as red, irritated patches, and it can happen in seconds on sensitive areas. Get into the habit of pausing every couple of minutes to touch the blade against the inside of your wrist or the back of your hand. If it feels too hot to hold there comfortably, it is too hot for your dog.
When a blade heats up, stop and let it cool, swap to a spare blade, or use a dedicated coolant spray. Keeping the blade well oiled also reduces friction and therefore heat, so add a drop of oil every ten minutes or so during a longer session. Working through a clean, dry, tangle-free coat helps too, because a dirty or matted coat forces the motor to work harder and the blade to run hotter. Small, steady sessions beat one long marathon.
Check blade temperature against your wrist every couple of minutes. If it is too hot for you, it is too hot for your dog, so pause, cool or swap the blade before continuing.
Handle Loose-Skin Areas: Armpit, Groin and Hock
Most clipper nicks happen where the skin is loose and mobile rather than stretched over muscle or bone. The armpits, groin, the folds beside the sanitary area and the back of the hock are the classic trouble spots. Here the skin can fold up into the blade in an instant, and a moving dog makes it worse. The rule is simple: always use your free hand to stretch the skin flat and hold it taut before the blade goes anywhere near it. A smooth, stable surface gives the clipper nothing to catch.
Go slowly over these zones and lift a leg gently to open up the armpit or groin rather than digging the clipper in. If your dog tenses or pulls away, pause and reassure rather than forcing the stroke. These areas rarely need to be perfectly tidy, so prioritise safety over a show finish. If you are new to clipping altogether, building up a calm handling routine first will give you the confidence and steady hands these delicate spots demand.
Choose Stroke Direction and Guard-First Technique
For a smooth, even and comfortable finish, clip in the direction the coat grows, from head towards tail and down the legs. Clipping with the lie of the coat leaves a natural-looking length and is far gentler on the skin than going against the grain. Clipping against the growth removes more hair and gives a much shorter, closer result, which experienced groomers sometimes use deliberately but which beginners should avoid until they are confident. Keep the blade flat against the body, angled slightly, and glide rather than press.
Always start with a guard comb fitted, and start longer than you think you need. A guard protects the skin, sets a consistent length and makes it almost impossible to go dangerously short by accident. You can always remove more hair on a second pass, but you cannot put it back, and a too-short clip can leave the skin exposed and prone to irritation. To match guard numbers to the finish you want, see choosing the right guard length before you begin.
Handle Corded and Cordless Clippers Correctly
Corded and cordless clippers each carry their own handling considerations. Corded models deliver constant power and never fade mid-clip, which suits thick or heavy coats, but the trailing lead needs managing so it does not wrap around a leg or spook your dog. Keep the cable behind you and clear of the blade. Cordless clippers give you freedom to move around a fidgety dog and reach awkward angles, but battery power can dip as the charge drops, and a tired battery often means a hotter, slower blade. Keep a spare charged or the base plugged in.
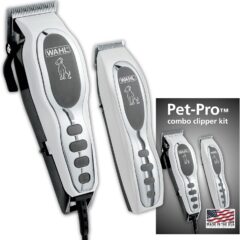
Whichever type you use, let the tool do the work and never push a struggling clipper through a mat, which strains the motor and drags on the skin. A quiet, low-vibration model helps anxious dogs stay still, so noise-sensitive dogs may do better with a cordless option designed to run softly. Well-reviewed kits such as the Wahl Pro Series kit and the Andis ProClip give you reliable power and a full set of guards to start with.
Prevent Clipper Rash and Burn
Clipper rash is the sore, red, sometimes bumpy irritation that appears a day or two after clipping, and it is almost always down to technique rather than bad luck. The main culprits are a hot blade, clipping too close against the grain, going over the same patch repeatedly, and a dull or dirty blade dragging on the skin. Sensitive areas like the belly and groin are the most prone. Prevent it by keeping blades cool and oiled, using an appropriate guard, and avoiding endless repeat passes over one spot.
A sharp, clean blade cuts rather than pulls, so maintenance is prevention. If your dog does develop irritation, stop clipping that area, keep it clean and dry, and let it settle; check with your vet if it does not improve or looks broken. Some dogs are simply more reactive than others, so learn your dog’s tolerance and build up slowly. Getting the fundamentals of grooming safety right from the start prevents the great majority of clipper injuries.
Clean, Oil and Maintain Your Clippers
Well-maintained clippers are safer clippers, because a neglected blade runs hotter, pulls the coat and nicks more easily. Build a simple routine around every clip. Before and after each session, brush the loose hair out of the blade with the little brush most kits provide, and add a few drops of blade oil to the teeth while the clipper runs briefly to spread it. Wipe away the excess so it does not clog. Oil keeps the cutting action smooth and the blade cool, which directly reduces the risk of burn.
Over time, blades dull and need professional sharpening or replacing, and clogged guards should be washed and dried fully before reuse. Store clippers somewhere dry, and for cordless models avoid leaving them fully drained for long periods to protect the battery. A little upkeep keeps the tool cutting cleanly for years and, more importantly, keeps every session comfortable for your dog. Treat maintenance as part of grooming, not an afterthought, and both blade and dog will thank you.
If you buy through our links we may earn a commission at no extra cost to you.
Frequently Asked
Check the blade against your wrist every couple of minutes, and if it feels hot, pause to let it cool, swap to a spare blade or use a coolant spray. Oiling the blade regularly reduces friction and heat, and working through a clean, dry, mat-free coat keeps the motor from overworking. Shorter sessions also help the blade stay cool.
For a comfortable, even finish, clip in the direction the coat grows, from head to tail and down the legs. Clipping against the grain removes far more hair and leaves a very short, skin-close result that is easy to overdo. Beginners should stick with the lie of the coat until they are confident.
Clipper rash usually comes from a hot blade, clipping too close against the grain, repeated passes over one spot, or a dull, dirty blade dragging on the skin. Keep blades cool and oiled, use a suitable guard and avoid going over the same area repeatedly. If irritation appears, let it settle and see your vet if it worsens.
Corded clippers give constant power for thick coats but you must manage the trailing lead. Cordless clippers offer freedom of movement and are often quieter for nervous dogs, but battery charge can fade and a tired battery runs hotter. Many owners keep a spare battery charged or choose a model that can run while charging.
Add a few drops of blade oil before each session and roughly every ten minutes during longer clips, running the clipper briefly to spread it and wiping away the excess. Brush out loose hair after every use. Regular oiling keeps the blade cutting cleanly and running cooler, which reduces the risk of clipper burn.