Pre-Groom Prep: Set Up Before You Start
A calm, well-organised space is the foundation of any dog grooming checklist. Before your dog joins you, gather every tool you will need and lay it out within arm’s reach: brush, comb, shampoo, clippers, guards, nail clippers, cotton wool and a stack of towels. Stopping halfway through to hunt for a comb is how dogs learn that grooming is stressful, so remove that friction in advance. Choose a non-slip surface, whether a rubber-matted table or a bath with a mat, because a dog that feels secure underfoot will fidget far less.
Give your dog a chance to settle and toilet first, then run your hands over the whole body. You are feeling for mats, lumps, ticks, sore spots and grass seeds, and noting anything that needs care later. This ten-second assessment tells you where to spend time and warns you of any tender areas to treat gently. If your dog is new to the process, keep the first sessions short and reward often. Our guide on grooming a dog at home covers building that positive routine from scratch.
Brush and Detangle the Coat Thoroughly
Always brush before bathing, never after. Water tightens existing knots into solid mats that become far harder to remove, so this order matters on any grooming checklist. Work methodically from head to tail, section by section, using a slicker brush to lift the coat and a metal comb to check your work. If the comb glides through cleanly from skin to tip, the area is done; if it snags, there is still tangle to tackle. Pay particular attention to friction zones: behind the ears, the armpits, the groin and the feathering on the legs.
When you meet a knot, hold the fur at the base so you are not dragging on the skin, and tease it apart gently with your fingers or the end of a comb. Never yank. For anything that has felted into a tight mat, take your time and read how to remove mats and tangles before reaching for scissors, which cause most home grooming injuries. A properly brushed-out coat is the single biggest factor in a clean bath and an even clip later.
Check Ears, Eyes and Face
With the coat detangled, turn to the delicate areas around the head. Wipe away any discharge from the corners of the eyes with damp cotton wool, using a fresh piece for each eye. Look for redness, cloudiness or excessive tearing, which can stain light coats and sometimes signal irritation worth watching. Trim any long hair that is falling into the eyes, working with blunt-tipped scissors and a steady hand while someone helps keep your dog still.
Inspect each ear next. A healthy ear looks pale pink and smells neutral; a strong odour, dark waxy build-up or persistent scratching all warrant a closer look. Clean only the visible part of the ear with a suitable product, and never push anything down into the canal. Cleaning ears and paws safely is a routine job once you know the technique. Handling the face calmly now, before the bath, means your dog is more relaxed for the wetter, noisier stages ahead.
Never insert cotton buds or any tool into the ear canal. Clean only what you can see and consult your vet if you notice a bad smell, discharge or pain.
Bath, Rinse and Dry Completely
Now the coat is tangle-free, bathing is straightforward. Wet your dog thoroughly with lukewarm water, then work in a dog-specific shampoo from the neck backwards, keeping suds away from the eyes and inner ears. Massage down to the skin rather than just the surface, and rinse until the water runs completely clear. Leftover shampoo is a common cause of itching and dull coats, so rinse for longer than you think you need to. For nervous dogs, a calm voice and non-slip footing make all the difference at bath time.
Drying is not optional, especially for thick or double coats where damp fur trapped near the skin can lead to hot spots. Towel off the bulk of the water first, then use a dryer on a warm, not hot, setting while brushing the coat straight. Work in sections until the fur is dry right down to the skin. A damp undercoat left to air-dry is a frequent cause of matting and odour, so finish the job properly before you clip.
Clip the Coat to Length
Clipping comes after the coat is clean and fully dry, because clippers glide best through fresh fur and a dirty coat blunts blades quickly. Start with a longer guard than you think you need; you can always take more off, but you cannot put it back. Move with the lie of the coat in long, smooth strokes, keeping the blade flat against the body and letting the clipper do the work rather than pressing down. Check the blade temperature regularly against the back of your hand, as blades heat up fast and can irritate the skin.
Take extra care over loose-skinned areas like the armpits, groin and hocks, stretching the skin taut with your free hand so it cannot fold into the blade. If you are unsure which guard suits your dog, choosing the right guard length maps numbers to millimetres and coat types, and covers technique in full. Finish with scissors to tidy the feet, sanitary areas and any feathering the clipper cannot reach neatly.
Trim Nails, Paws and Finish With a Health Check
Nails are the final grooming job and the one most owners dread, but regular trims keep them short and painless. Take off only the tip, staying clear of the quick, and if in doubt do a little more often rather than a lot at once. Grinders offer more control for dark nails where the quick is hard to see. Check the paws too: trim the hair between the pads, look for cracks or foreign bodies, and feel for any soreness. Our nail grinder review is a useful reference if clippers make your dog anxious.
End every session with a proper head-to-tail health check, which is the real value of a grooming routine. Run through this quick list:
- Skin: lumps, scabs, fleas, dryness or hot spots
- Coat: any remaining tangles or thin patches
- Eyes and ears: discharge, redness or odour
- Teeth and gums: tartar, bad breath or inflammation
- Paws and nails: length, cracks and pad condition
Reward your dog generously and note anything to monitor, so grooming becomes both a tidy-up and an early-warning system for your dog’s health.
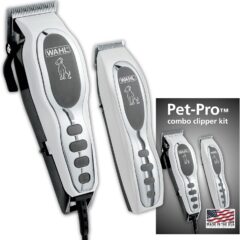
If you buy through our links we may earn a commission at no extra cost to you.
Frequently Asked
Work through prep, then brushing and detangling, then ears and eyes, then bath, then a thorough dry, then clipping, and finally nails and paws with a health check. Brushing always comes before bathing, and drying always comes before clipping. Following this order keeps the process efficient and comfortable for your dog.
Brushing frequency depends on coat type, from daily for long or double coats to weekly for short coats. A full bath and clip is usually needed every four to eight weeks for breeds with continually growing hair. Nails and a quick health check should be done every couple of weeks regardless of breed.
Water tightens existing knots into dense mats that are much harder and more painful to remove. Brushing and detangling a dry coat first means the bath cleans effectively and the coat dries evenly. Bathing a matted dog almost always makes the matting worse.
It is risky, especially for thick or double coats. A damp undercoat left against the skin can trap moisture and lead to hot spots, odour and matting. Towel off first, then dry down to the skin on a warm setting before you clip.
Yes, and it is one of the biggest benefits of a grooming routine. Running your hands over the whole body while checking skin, ears, eyes, teeth and paws helps you spot lumps, parasites or soreness early. Catching a problem sooner nearly always makes it easier to treat.