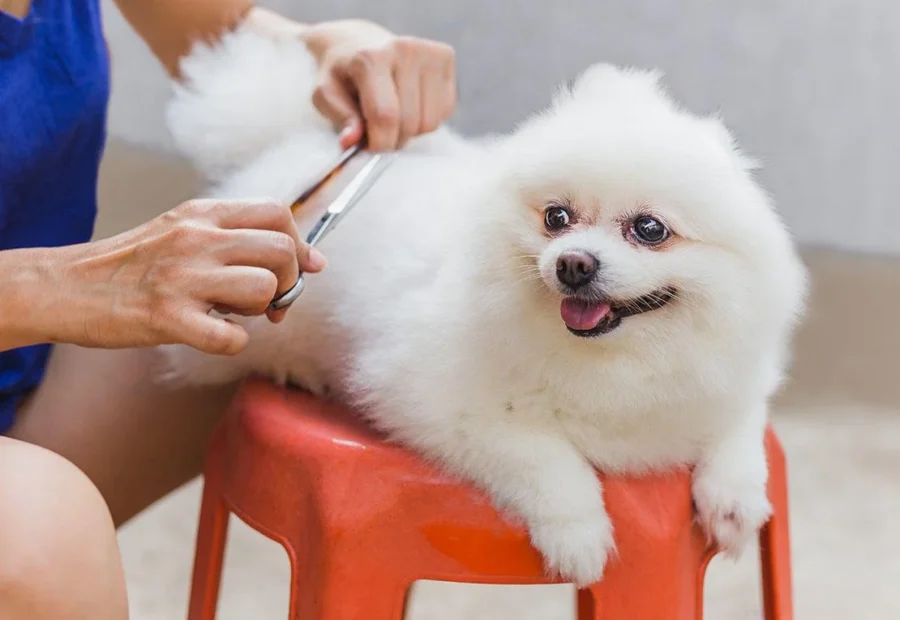
Brush Out Before Anything Gets Wet
Work through the entire coat with a slicker brush before a single drop of water touches your dog. Water tightens loose knots into dense felt that no clipper will cut cleanly, so the brush-out is the step that quietly decides how the whole groom goes. Move in the direction the hair grows, section by section, and follow every pass of the slicker with a steel comb — if the comb glides from skin to tip without catching, that patch is genuinely mat-free and you can move on.
Give extra attention to the friction zones where mats form first: behind the ears, in the armpits, along the britches on the back legs, under the collar and around the base of the tail. Hold the fur at its base with your free hand as you brush, so you are working against your own grip rather than dragging on the skin. That one habit takes the sting out of a stubborn tangle and keeps a nervous dog calm enough to let you finish.
When the comb snags, resist the urge to pull. Tease the knot apart from its outer edge inward, freeing a few hairs at a time with your fingers or the end tooth of the comb; a dab of detangling spray buys you a little slip on a tight one. If you meet matting that sits close to the skin or spreads across a whole panel, stop here and read our mats and tangles guide before you go near it with a blade — shaving blindly over a hidden mat is exactly how skin gets nicked.
Ten unhurried minutes now saves half an hour later, and it doubles as a health check: your hands will find lumps, scabs, fleas or grass seeds long before you would ever see them.
Bathe and Dry Completely
With the coat knot-free, run a bath in lukewarm water — comfortably warm against the inside of your wrist, never hot. Wet the coat thoroughly from the neck back, tucking a cotton ball into each ear to keep water out of the canal and steering clear of the eyes. Massage a dog-specific shampoo into a lather along the body, legs and tail, and leave the face for a damp cloth at the very end.
Rinse for far longer than feels necessary — until the water runs completely clear and the coat squeaks faintly between your fingers. Leftover shampoo is the single most common cause of post-bath itching and flaking, and double coats hide suds deep in the undercoat, so rinse those breeds through twice. If you use a conditioner, now is the moment; it makes the final comb-through almost effortless.
Drying matters every bit as much as washing. Squeeze — do not rub — the coat with a towel to lift the bulk of the water, then dry fully: a dryer on a low, warm setting kept constantly moving so it never bakes one spot, or plenty of air-drying time for a short coat. Brush longer coats as they dry to set the hair straight. Never clip a damp coat — moisture dulls blades quickly, drags on the hair and leaves a ragged, uneven finish.
Clip With the Growth, Longest Guard First
Before the blade touches your dog, switch the clipper on and rest it against your hand near their shoulder for a few seconds — a small “this noise is nothing to worry about” moment that prevents a lot of flinching later. Fit your longest guard first. You can always take a second pass with a shorter comb to go tidier; you can never put fur back, so long-first is the rule that saves regret.
Start on the broad, flat plane of the back and work in long, slow strokes in the direction the hair grows. Keep the blade flat and level against the body — tilting the edge inward is what leaves tram-lines and clipper rash. Let the clipper cut at its own pace rather than forcing it; if it bogs down, the coat is not quite dry or brushed-out enough, or the guard is too short for that density.
Check the blade temperature against the inside of your wrist every couple of minutes. Blades warm with use, and a hot blade turns uncomfortable fast — if it is too warm to rest on your own skin, pause and either swap to a spare blade or spray on a coolant and let it rest. A drop of blade oil across the teeth every ten minutes keeps it cutting cool and clean.
Armpits, the groin and the loose folds at the hock and elbow hide skin that lifts and catches in a moving blade. Stretch that skin flat and taut with your free hand before you clip these areas, go slowly, and use a guard rather than a bare blade. Full technique is in How to Use Dog Clippers Safely.
Detail the Face, Ears and Paws With Scissors
Put the clipper down for the delicate work. Around the eyes, muzzle, ear edges and feet a clipper is too blunt an instrument and too close to things you cannot afford to catch, so switch to blunt-tipped safety scissors — shaped so a sudden head-turn cannot drive a point into skin.
On the face, comb the hair forward and trim only what falls past the natural line of the eye or muzzle, always cutting with the points aimed away from the eye. For the ears, comb the feathering out flat and cut along the edge of your own fingers so your hand sets the line and shields the ear leather. Trim the fur between and around the paw pads level with the pads themselves — overgrown pad-fur mats, slips on hard floors and traps grit — then round off the hair around each foot into a neat shape.
Work in small snips, stopping often to comb the area and check your line against the other side. This is the detail that makes a home groom look finished rather than merely functional, and it is the part most worth slowing right down for.
Trim Nails a Sliver at a Time
Take the tiniest sliver off the tip of each nail, then look at the freshly cut face before you cut again. On pale nails a chalky white ring appears first, then a small pink or dark dot in the centre — that dot is the quick, the nerve and blood supply, coming into view, and it is your signal to stop on that nail. Little and often always beats one brave cut.
On dark nails you cannot see the quick, so a grinder gives far more control than clippers: take the nail down in gentle passes, pausing to check the cut face for that developing dot. Whichever tool you use, keep styptic powder within reach — if you do catch a quick, press a pinch to the nail for a few seconds and the bleeding stops.
Do not forget the dewclaws on the inside of the leg; they never touch the ground, so they curl round unchecked and can grow into the pad. A reliable rule: if you can hear nails clicking on a hard floor, they are overdue. Trim a sliver weekly and nail day becomes a ten-second non-event rather than a monthly wrestling match — and regular trimming gradually shortens the quick, giving you more room to work over time.
Finish, Check and Reward
Run the comb through the whole coat one last time to lift any clipped ends and catch a stray tangle, evening out anywhere the length looks uneven while the coat is still fresh in your hands. Wipe gently inside each ear flap with a damp cotton pad — never a bud pushed into the canal — and take a moment to check the skin folds, armpits and base of the tail for redness, lumps or anything that was not there last time.
Then finish the way you want every groom to be remembered: a handful of treats, a proper fuss and a genuinely happy tone. The single biggest factor in whether the next groom is easy is how this one ends — you are training a dog that walks toward the kit, not one that hides when it comes out.
Last, look after the tools that just looked after your dog. Brush the clipped hair out of the blade, add a drop of oil across the teeth and run the clipper for a few seconds to work it in, then wipe everything down and store it dry. Two minutes now and the kit is ready — and cutting cool — next time.
If you buy through our links we may earn a commission at no extra cost to you.
Frequently Asked
Brush weekly, and run the full routine every four to eight weeks depending on coat — curly and double coats need the short end of that range.
Split the groom over several short sessions and reward constantly — you don't have to finish in one go. A quiet cordless kit helps enormously.
No to both. Human clippers stall in dense fur and run hot, and human shampoo is the wrong pH for canine skin — it strips oils and causes itching.
The longest one in the kit. You can always take another pass with a shorter guard — you can't put fur back. Most home cuts settle around 13–16mm on the body.
For breed-standard cuts, show trims or heavy matting, yes — a pro visit once or twice a year keeps the coat structure right. Home grooming handles everything in between.